An XML sitemap is an important ranking factor of SEO and it is a file that tells search engines what pages need to be indexed on your website. You can create XML Sitemaps manually through Screaming frog or through an XML sitemap Generator.
You can also use plugins like Yoast SEO and RankMath SEO to generate sitemaps. Once you create a sitemap, you can submit it to Google to inform search engines about the URLS that you prefer indexing. In this article, we will look at the different ways to generate an XML sitemap, including how to create XML sitemap manually and also the XML sitemap best practices.
So, let’s dive in!
What is an XML Sitemap?
So, What is an XML Sitemap?
An XML sitemap is a file that tells search engines which of your pages should be indexed in your website. Adding an URL to a sitemap does not however guarantee that the site will be crawled and indexed. But, it can help Google in discovering pages that would otherwise not be crawled and discovered easily.
Matt Cutts, a famous Google engineer explains sitemaps in the following way.
“Imagine if you have pages A,B,C on your site. We find pages A and B through a normal web crawl of our links. Then you build a sitemap and list pages B and C. Now, there’s a chance (but not a promise) that we’ll crawl page C. We won’t drop Page A just because you don’t list it in your sitemap.
And just because you mentioned a page in your sitemap that we didn’t know about, doesn’t mean we will crawl it. But , if for some reason, we didn’t see any links to C or the page was rejected due to some reason, now there’s a chance, we might crawl page C.”
XML sitemaps are particularly useful in cases where the site is not fully indexed. Also, as sites grow in size, it might be difficult to interlink all the existing pages. In such cases, an XML sitemap is of profound importance to make sure all the pages on your site are included and indexed.
Why do You Need a Sitemap for SEO
An XML sitemap also provides additional information about each URL such as
- When the page was last modified
- How often the page is updated
- The relative importance of the page
Google uses this information to crawl and index your pages more effectively and efficiently.
That is why XML sitemaps are important in Search engine optimization.
Now let us look at some benefits.
- Verification of XML sitemaps indicate positive trust signals
- For the pages the search engine already knows about, Google uses the metadata information like the last date the content was modified to improve how they crawl your site.
- For pages they don’t know about, they use these additional URLs to increase the crawl coverage.
- For URLs that have duplicates, the search engines use the XML sitemaps to select a canonical version.
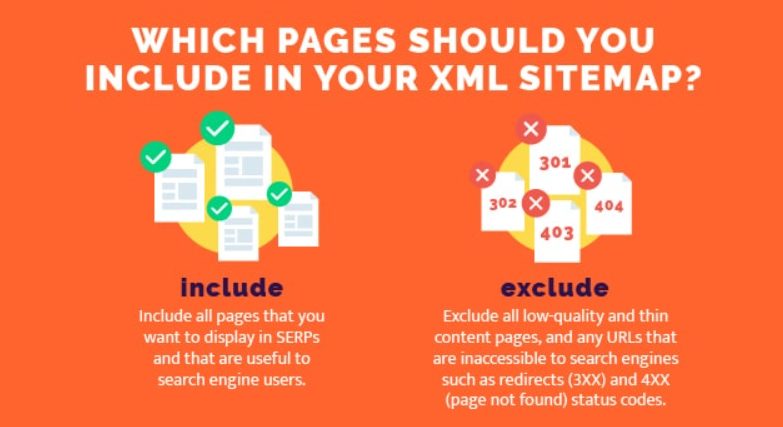
Which Pages Should You Include in an XML Sitemap?
All your important pages should be included in your sitemap like Home Page, Products and Services pages etc. In other words, include all pages that you want to see in your search results.
Exclude other pages like privacy policy, login page etc from your sitemap as you don’t need them in your search results.
But remember, just because you omit a page from your sitemap doesn’t mean it won’t get indexed.
If any page has links pointing to it, there’s a chance that Google will crawl, index, and display that page in search engine results.
To ensure the removal of a page from search results,we need to omit the page from the XML sitemap and add a no-index tag to it.
The other important thing to remember is that:
Every page in your XML sitemap must also be indexable.
Your sitemap should never contain pages that return these status codes:
404 – Page not found
301 or 302 – Page moved to another location
This is not a good ranking signal and results in your crawl budget being wasted.
Layout of an XML Sitemap
It is likely that the CMS that you use to manage your website’s content automatically generates and updates your XML sitemap.
You may be able to find yours by going to https://www.yourdomain.com/sitemap.xml
Following is the example of a sitemap created with WordPress CMS.
<?xml version=”1.0″ encoding=”UTF-8″?>
<urlset
xmlns=”http://www.sitemaps.org/schemas/sitemap/0.9″
xmlns:xsi=”http://www.w3.org/2001/XMLSchema-instance”
xsi:schemaLocation=”http://www.sitemaps.org/schemas/sitemap/0.9
http://www.sitemaps.org/schemas/sitemap/0.9/sitemap.xsd”>
<url>
<loc>https://www.example.com/</loc>
<lastmod>2023-04-08T09:30:00+00:00</lastmod>
<changefreq>daily</changefreq>
<priority>1.0</priority>
</url>
<url>
<loc>https://www.example.com/about/</loc>
<lastmod>2023-03-15T12:00:00+00:00</lastmod>
<changefreq>monthly</changefreq>
<priority>0.8</priority>
</url>
<url>
<loc>https://www.example.com/services/</loc>
<lastmod>2023-04-01T15:45:00+00:00</lastmod>
<changefreq>weekly</changefreq>
<priority>0.9</priority>
</url>
<url>
<loc>https://www.example.com/blog/</loc>
<lastmod>2023-04-07T18:15:00+00:00</lastmod>
<changefreq>daily</changefreq>
<priority>0.7</priority>
</url>
<url>
<loc>https://www.example.com/contact/</loc>
<lastmod>2023-02-28T10:00:00+00:00</lastmod>
<changefreq>monthly</changefreq>
<priority>0.6</priority>
</url>
</urlset>
There are various plugins like Yoast SEO and Rankmath SEO that can help you create sitemaps within WordPress. We will now look at different ways to generate XML Sitemaps using plugins.
How to Generate an XML Sitemap Using Rankmath SEO
Creating an XML sitemap with Rank Math SEO is a straightforward process. Here’s a step-by-step guide on how to create an XML sitemap using Rank Math SEO:
Step 1: Install and Activate Rank Math SEO:
If you haven’t already, install the Rank Math SEO plugin on your WordPress website.
Go to the WordPress dashboard, navigate to “Plugins” > “Add New”.
Search for “Rank Math SEO” in the plugin repository.
Click on the “Install Now” button and then “Activate” the plugin.
Step 2: Configure Rank Math SEO
Upon activation, Rank Math SEO will prompt you to go through a setup wizard.
Follow the setup wizard and configure the basic settings according to your website’s requirements.
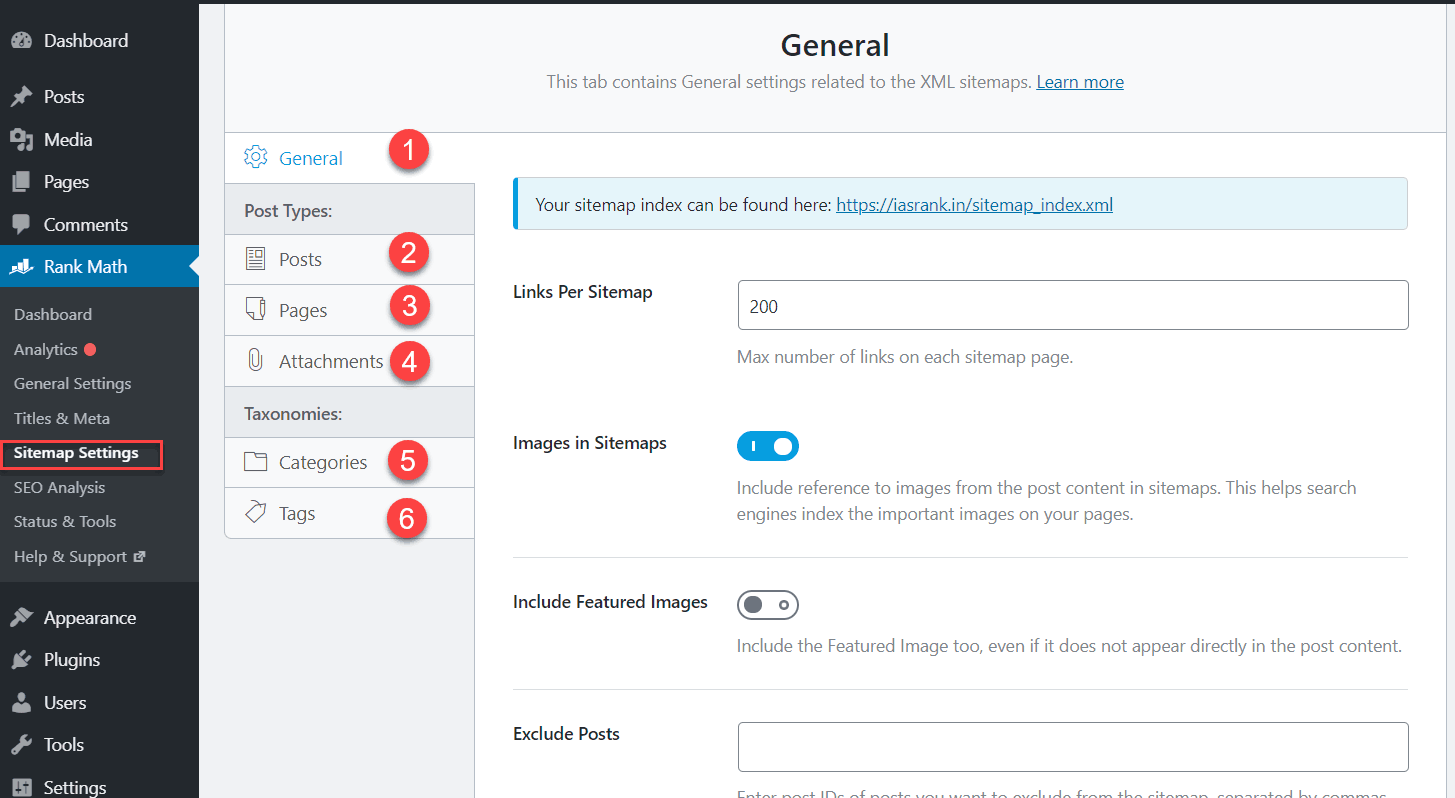
Step 3: Access the Sitemap Settings
In the WordPress dashboard, go to “Rank Math” > “General Settings”.
Click on the “Sitemap Settings” tab.
Step 4: Enable XML Sitemap
In the “Sitemap Settings” section, you will see an option to enable the XML sitemap.
Make sure the “Enable Sitemap” checkbox is ticked.

Step 5: Configure Sitemap Settings
Scroll down to the “Sitemap Settings” section.
Here, you can customise various settings related to your XML sitemap.
You can choose which post types to include in the sitemap.
After configuring the sitemap settings, click on the “Save Changes” button at the bottom of the page.
How to Generate an XML Sitemap using AllinOne SEO
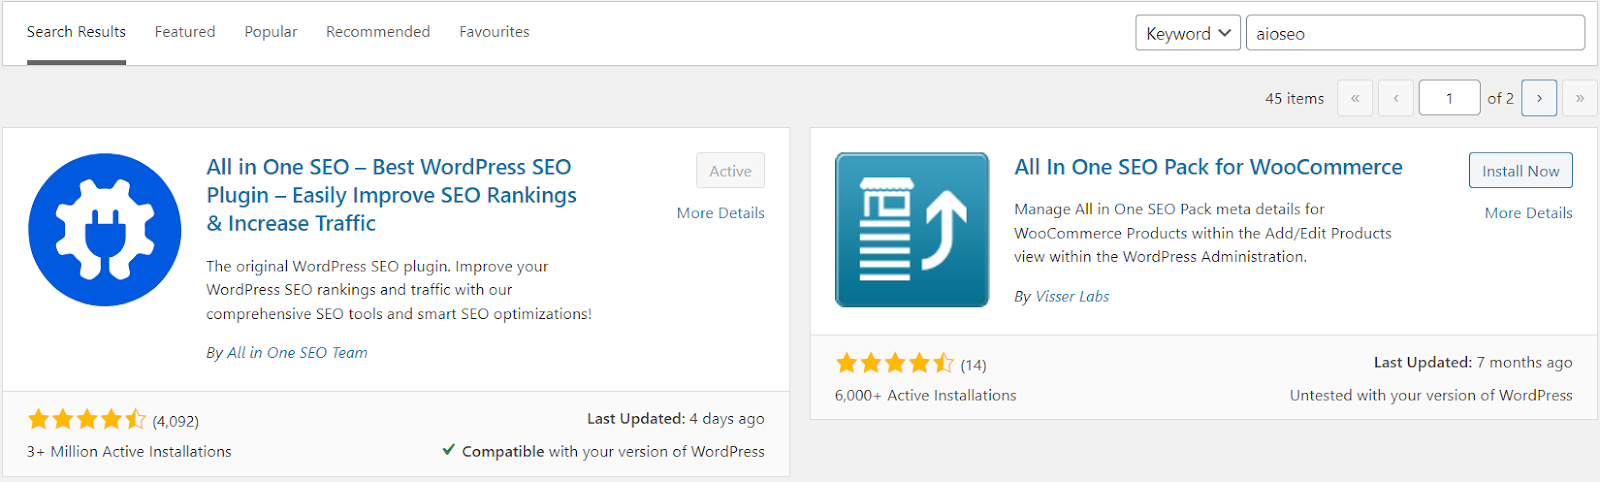
Step 1: Install and Activate the AIOSEO Plugin
First, install and activate the All in One SEO plugin on your WordPress website. You can do this by going to “Plugins” → “Add New” in your WordPress dashboard, searching for “All in One SEO,” and clicking on “Install Now” and then “Activate.”
Step 2: Access the AIOSEO Settings
Once the plugin is activated, you’ll see a new “All in One SEO” menu in your WordPress dashboard. Click on it to access the plugin’s settings.
Step 3: Navigate to the XML Sitemap Settings
In the AIOSEO settings, click on the “Sitemaps” tab to access the XML sitemap settings. Here you’ll find various options to configure your sitemap.
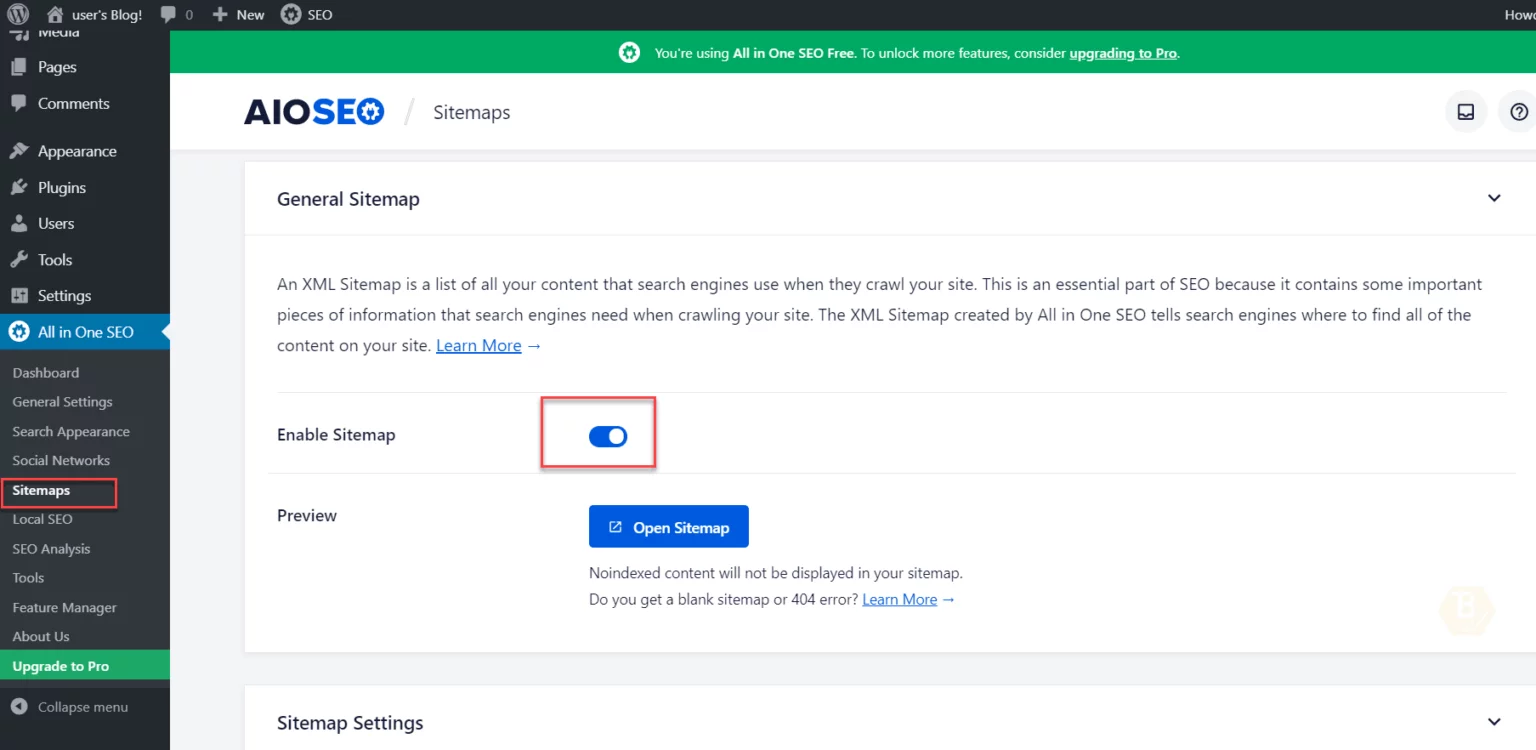
Step 4: Enable the XML Sitemap
Under the “General Sitemap Settings” section, make sure the “Enable Sitemap” option is toggled on. This will ensure that AIOSEO generates an XML sitemap for your website.
Step 5: Configure Sitemap Settings
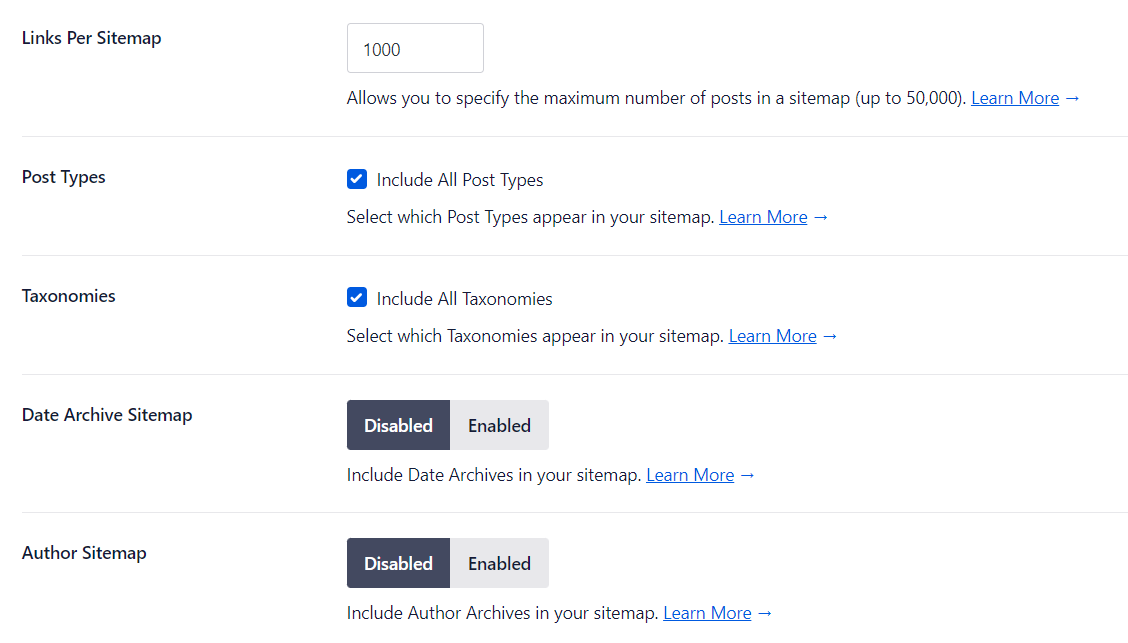
In the “General Sitemap Settings” section, you can configure various options such as the sitemap filename, compression, maximum URLs per sitemap, and more. Adjust these settings according to your website’s requirements.
Step 6: Select Post Types and Taxonomies
Move down to the “Included Post Types” and “Included Taxonomies” sections. Here, you can choose which post types and taxonomies you want to include in your XML sitemap. By default, AIOSEO includes posts and pages. Check the boxes next to the desired post types and taxonomies.
Step 7: Exclude Specific Posts, Pages, or Terms
If there are specific posts, pages, or terms that you want to exclude from your XML sitemap, you can do so in the “Excluded Posts” and “Excluded Terms” sections. Enter the post IDs, page IDs, or term IDs you want to exclude, separated by commas.
How to Generate an XML Sitemap using Yoast SEO
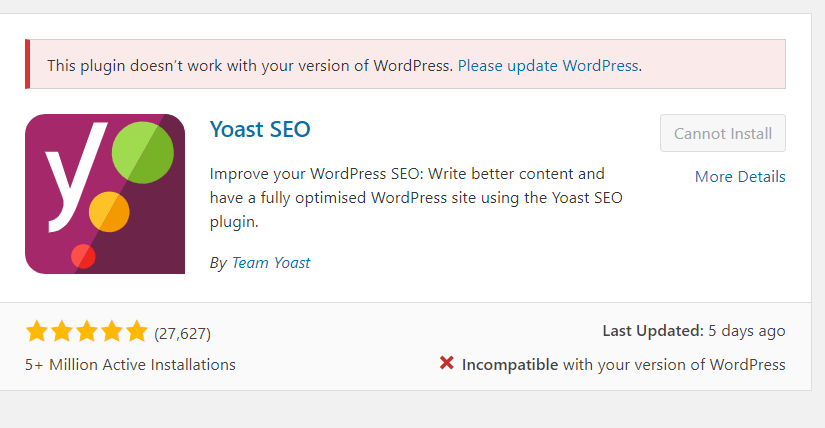
Step 1: Install and Activate the Yoast SEO Plugin
Install and activate the Yoast SEO plugin on your WordPress website. You can do this by going to “Plugins” → “Add New” in your WordPress dashboard, searching for “Yoast SEO,” and clicking on “Install Now” and then “Activate.”
Step 2: Access the Yoast SEO Settings
Once the plugin is activated, you’ll see a new “SEO” menu item in your WordPress dashboard. Click on it to access the plugin’s settings.
Step 3: Navigate to the XML Sitemaps Settings
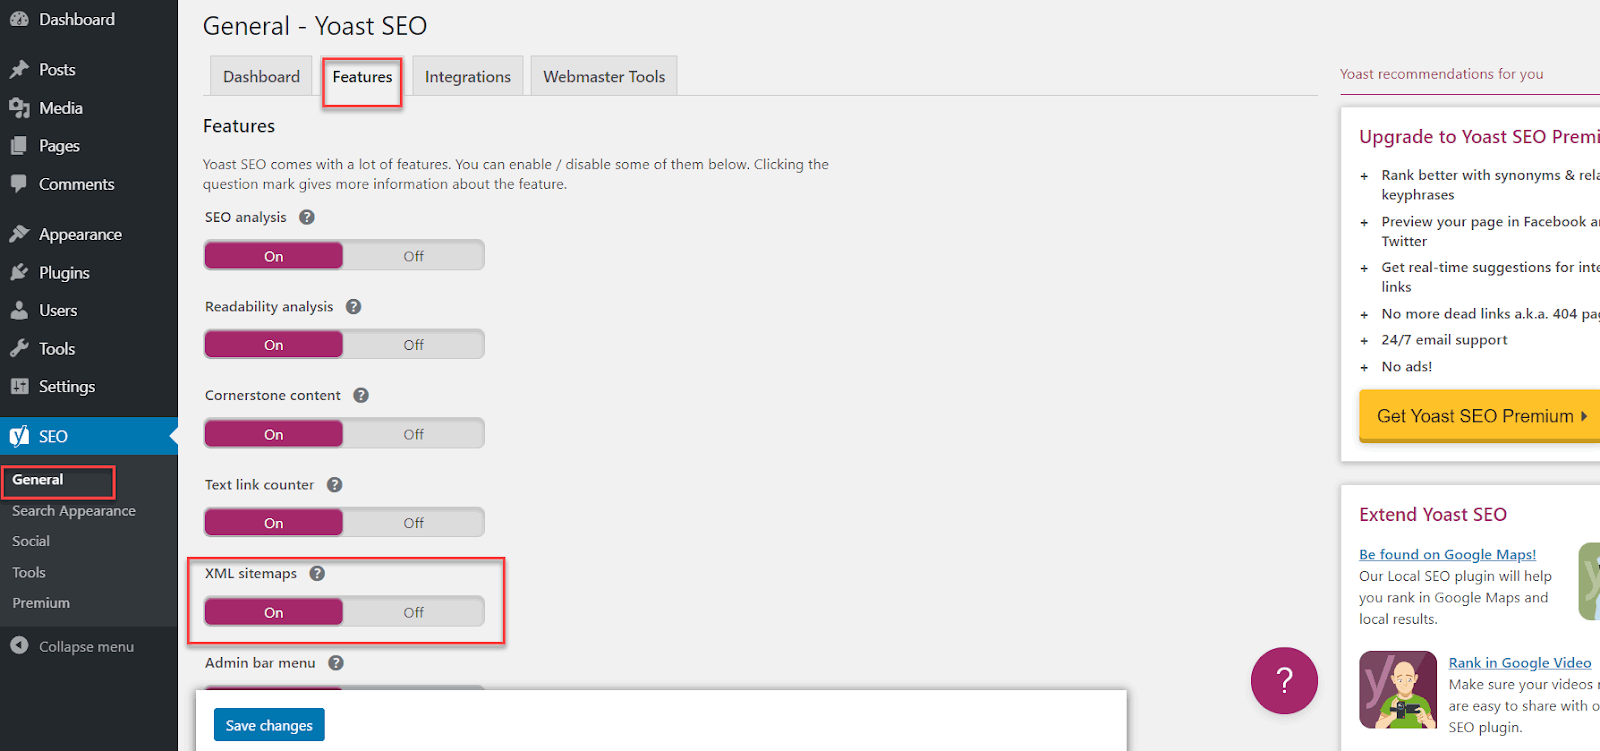
In the Yoast SEO settings, click on the “General” tab and then the “Features” tab. Scroll down to the “XML Sitemaps” section.
Step 4: Enable the XML Sitemap
In the “XML Sitemaps” section, toggle the switch to enable XML sitemaps. This will ensure that Yoast SEO generates an XML sitemap for your website.
Step 5: Configure Sitemap Settings
Click on the “See the XML Sitemap” link to view your XML sitemap settings. Here, you can configure which post types and taxonomies you want to include in your sitemap.
Step 6: Select Post Types and Taxonomies
In the “Post Types” and “Taxonomies” sections, check the boxes next to the post types and taxonomies you want to include in your XML sitemap. By default, Yoast SEO includes posts and pages. If you have custom post types or taxonomies, you can include them as well.
Step 7: Exclude Specific Posts, Pages, or Terms
If there are specific posts, pages, or terms that you want to exclude from your XML sitemap, you can do so by scrolling down to the “Excluded Posts” section. Enter the post IDs, separated by commas, that you want to exclude from your sitemap.
Step 8: Submit Your XML Sitemap to Search Engines
After saving your changes, Yoast SEO will automatically generate an XML sitemap for your website. You can access the sitemap by appending “/sitemap_index.xml” to your website’s URL (e.g., https://www.example.com/sitemap_index.xml). Submit this URL to search engines like Google and Bing through their respective webmaster tools to help them discover and index your website’s pages more efficiently.
These plugins will automatically update the sitemap whenever you add new content to your website, ensuring that search engines always have the most up-to-date information about your site’s structure.
How to Create a Sitemap in Webflow CMS
When you set up custom domain hosting with Webflow, you can automatically generate an XML sitemap or add your own
Webflow has an auto-generated sitemap feature which creates a sitemap and updates it each time you publish your site.
You can enable it by going to
Site settings -> SEO tab -> Sitemap section
Toggle Auto-generate sitemap to “Yes” to enable the auto-generated sitemap
Adding a custom sitemap is also quite easy in webflow CMS. You just need to toggle the auto-generate-sitemap to “no” and then paste your custom sitemap in the custom sitemap.xml field.
Once you’ve generated your sitemap, you also need to tell Google about your sitemap using one of the following methods:
- Add your sitemap to your site’s robots.txt file
- Submit your sitemap to Google Search Console
How to Generate a Sitemap in Shopify
When you create a website using Shopify, the platform automatically generates an XML sitemap for you. However the drawback is that you cannot include or exclude URLs like the other platforms.
If you wish to prevent certain pages from appearing in search results, the only option available on Shopify is to directly add a noindex tag to the relevant files
How to Create an XML Sitemap Manually
Now let us look at how to create an XML sitemap manually. This can be done in 2 ways- Using Screaming frog or using an XML sitemap generator.
We are going to use Screaming Frog to create a Manual XML sitemap.
All we need to do is run the screaming frog spider for your website and then click on Sitemap -> XML Sitemap
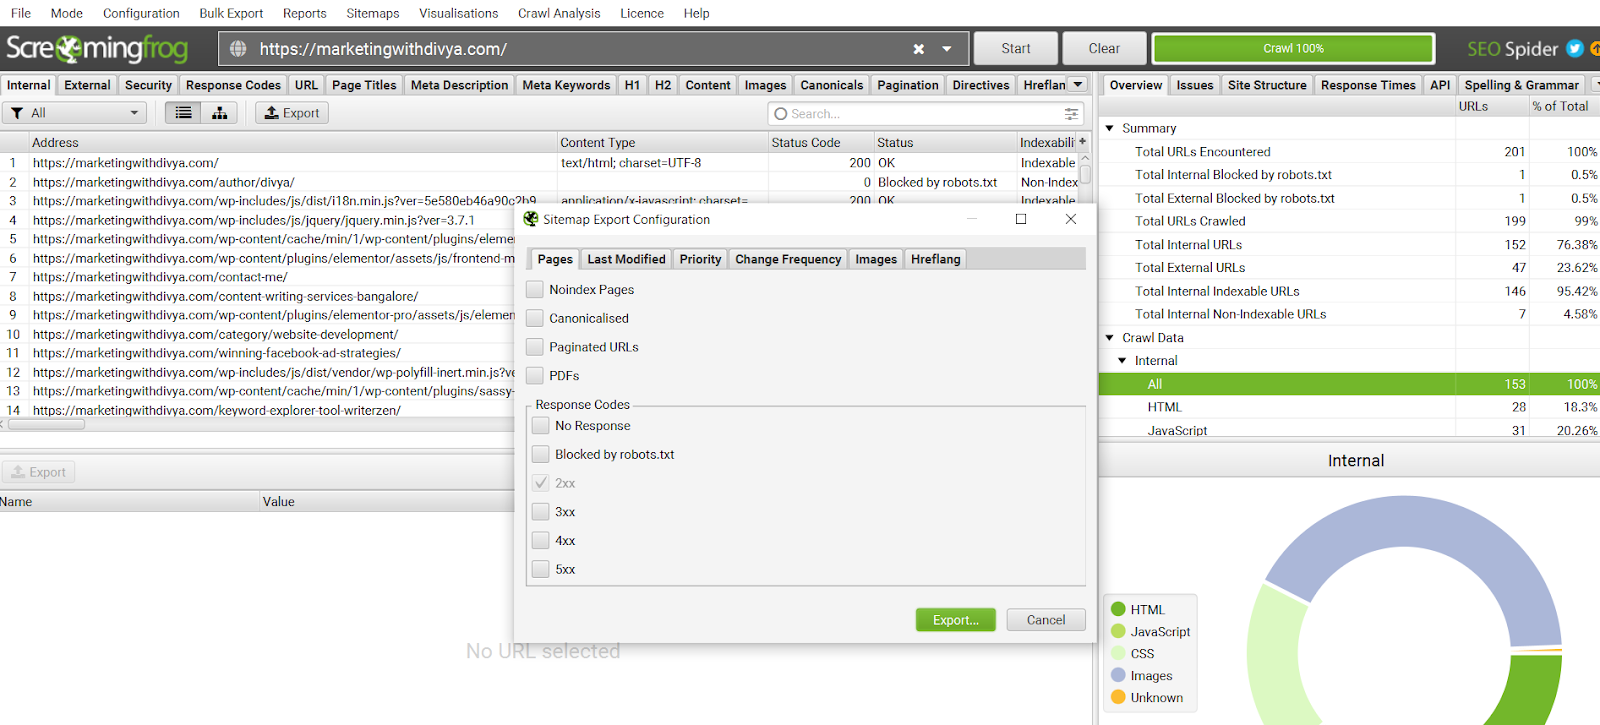
Exclude <changefreq>, <priority> and <lastmod> from your XML sitemap. Then extract the sitemap file.
You can now also add any URLs and delete URLs as needed and then upload it to the root folder of your website, with “sitemap.xml” as its filename.
The process of creating an XML sitemap manually with an XML Sitemap generator is intuitive and quite easy to use. All that you need to do is go to a Sitemap generator and input the necessary details for your sitemap to be created.
Sample Sitemap Generator Site: https://www.mysitemapgenerator.com/
How to Submit Your XML Sitemap to Google Search Console
Now that you have your sitemap created, the final step is to submit your sitemap to Google. IF you created your sitemap manually or using any of the plugins, then the sitemap can be found at the root folder
yourdomain.com/sitemap.xml
On the other hand, if you’re site is on WordPress and you’ve used Yoast for your sitemap.xml, then you’ll find the sitemap index at this URL:
yourdomain.com/sitemap_index.xml
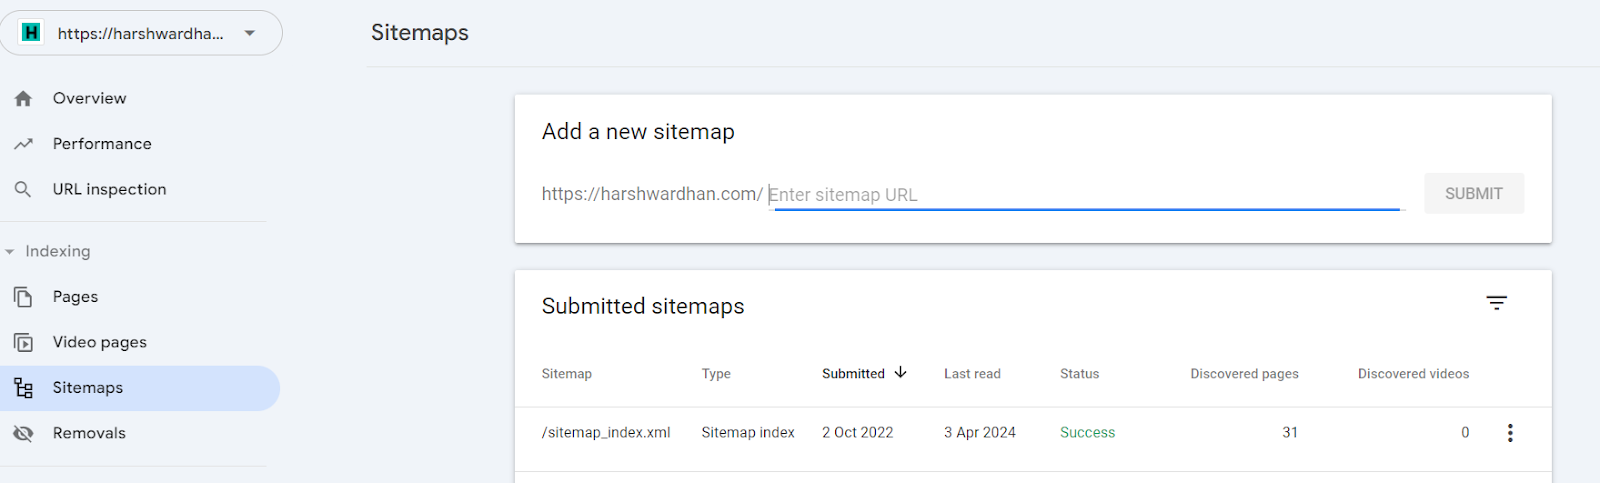
Now all that you need to do is go to indexing -> sitemaps on Google
Next, paste your sitemap URL into the sitemap field and hit “Submit.”
Your sitemap “should” submit successfully:
Common Mistakes to Avoid When Creating XML SiteMaps
- Including 404 URLs: One of the most common mistakes is including 404 URLs in the sitemap. This can lead to crawl budget wastage and reduced trust factors in your website.
- Not updating the sitemap regularly: This can lead to outdated content being indexed and new pages not being crawled by the search engines
- Incorrect ‘Changefreq’ and ‘priority’ values – Can lead to inefficient crawling by search engines.
- Not Submitting the SiteMap to Search Engines – This is the most important step once the sitemap has been created. If your sitemap is not submitted to search engines, it wont serve its purpose.
XML Sitemap Best Practices
1) Use Tools & Plugins to Generate Your Sitemap Automatically
2) Submit Your Sitemap to Google
3) Prioritise High-Quality Pages in Your Sitemap
4) Include Only Canonical Versions of URLs in Your Sitemap
5) Create Dynamic XML Sitemaps for Large Sites
Related: